
Tom Hadley
Content Writer
Helm is a warehouse management software designed for 3PL businesses and fulfillment centers. It empowers users with a centralized platform to manage their entire fulfillment operation, from order and stock management, through to delivery and returns.
Check our top five 3PL Warehouse Management System picks.
How Does Helm Stand Out From Other Warehouse Management Systems?
On top of the functionality that you would get with a standard warehouse management system, Voila allows businesses to set up individual hubs for each of their fulfillment clients, giving them a window into the status of their orders, as well as access to certain warehousing features such as performance reports and purchase ordering. This way you can ensure full transparency between you and your clients, fostering brand trust and reducing customer inquiries, all while remaining in full control of your warehouse. It also offers an integrated billing solution, allowing users to automate client invoicing.
In this guide, we’ll cover how to set up client hubs in Helm. Let’s dive in!
Creating a Fulfillment Client
1. Head over to your Fulfillment Clients menu via Settings.
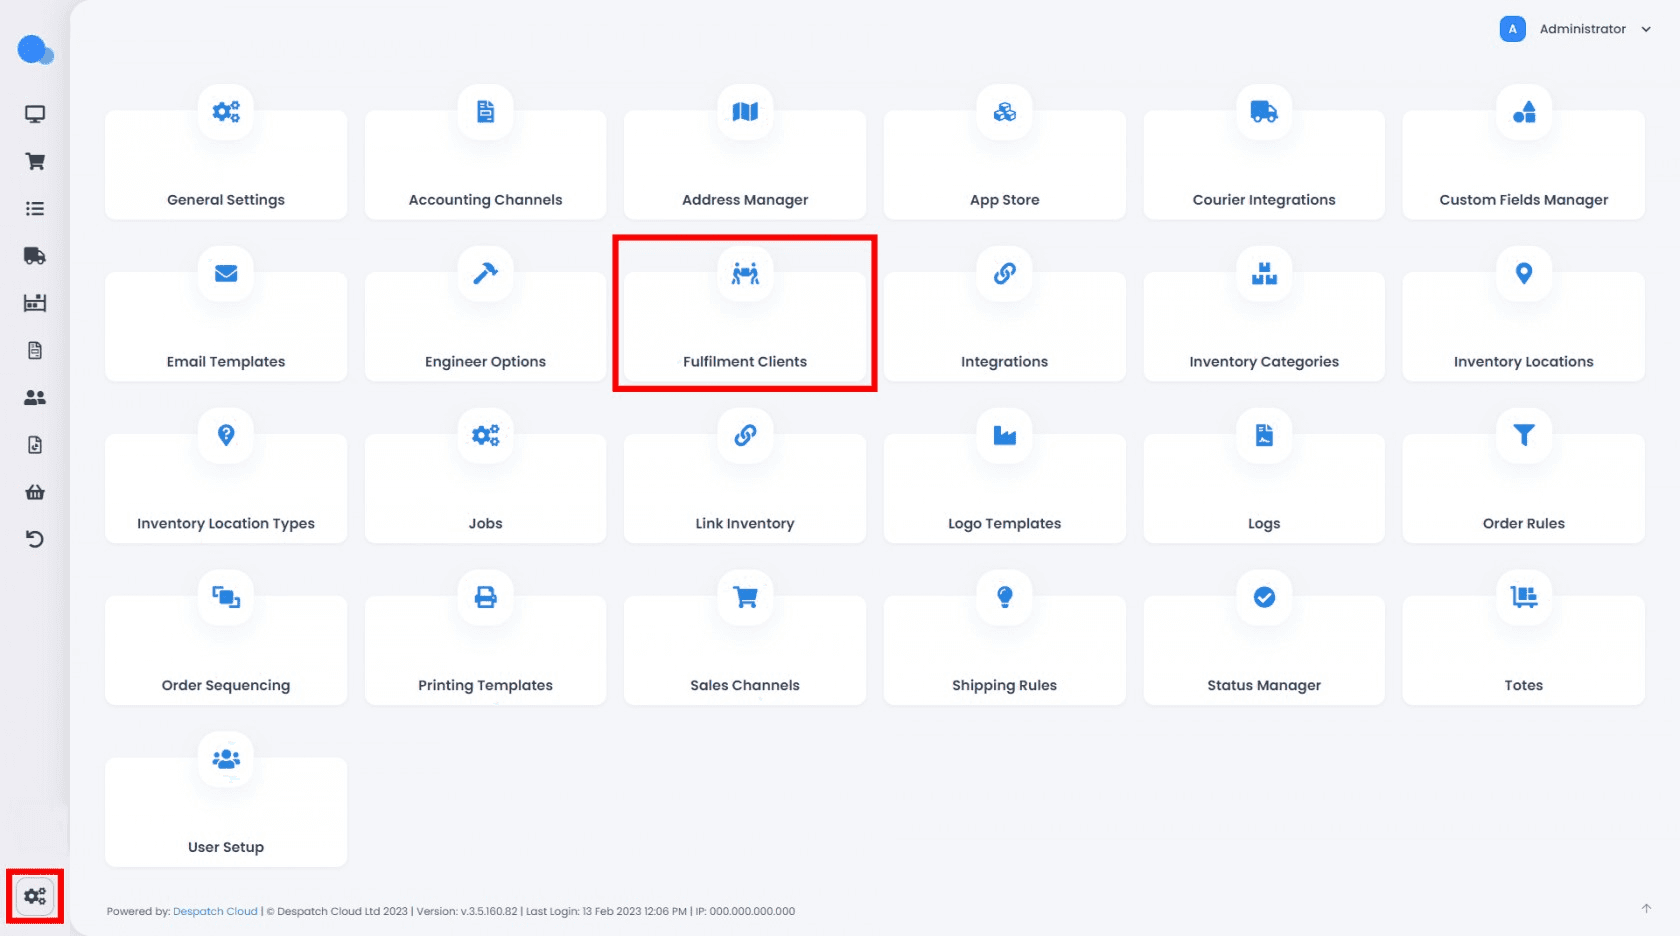
Here you’ll find a breakdown of all the client accounts you’ve set up under your master Fulfillment account.
2. Create Client
Click the Create Client tab, then fill out all the relevant fields with your new client’s data.
This will be the default client information that will automatically populate packing slips and invoices unless different data is provided. You can also give your client an account ID, which is essentially a numerical value that helps identify them within the system.
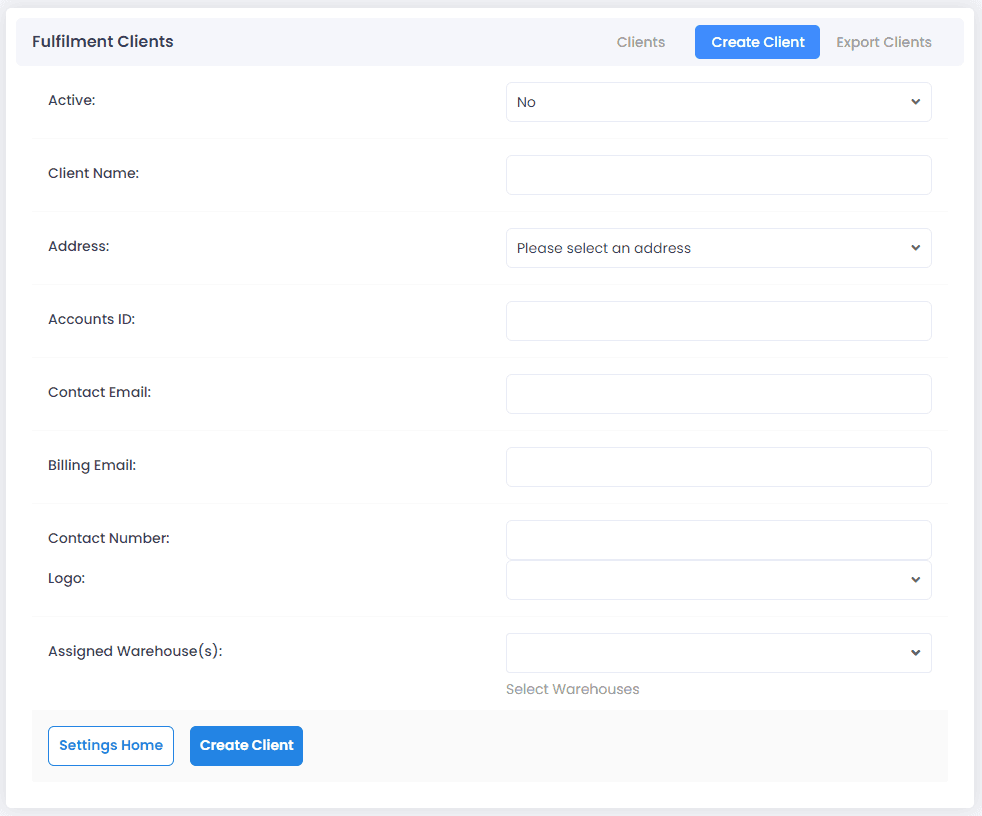
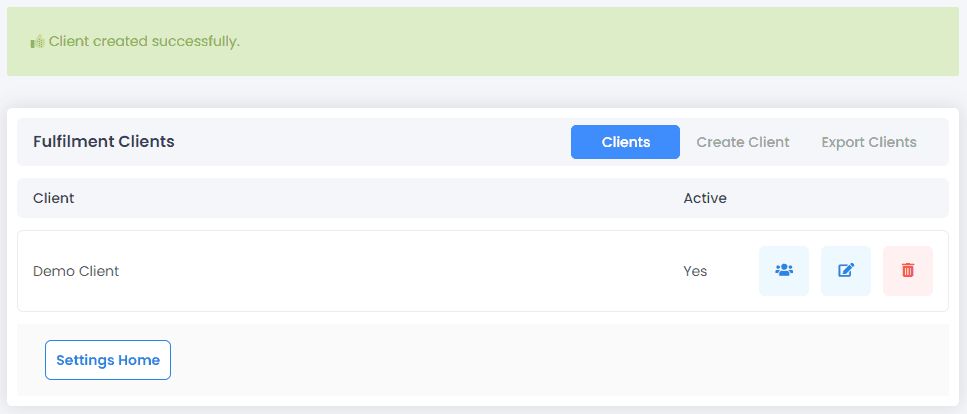
3. Client Created Successfully
Once a client is successfully created, you’ll receive a success message like the one below, and your new client will now appear under your Fulfillment Clients list.
Creating a Fulfillment Client User
You can create multiple user accounts for each of your fulfillment clients.
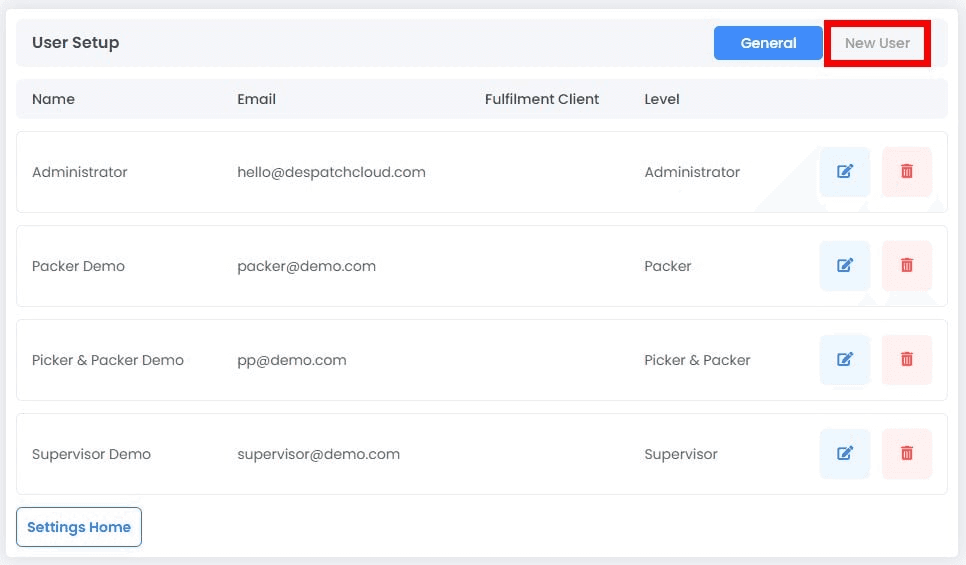
1. Head Over to Your User Setup Menu via Settings.
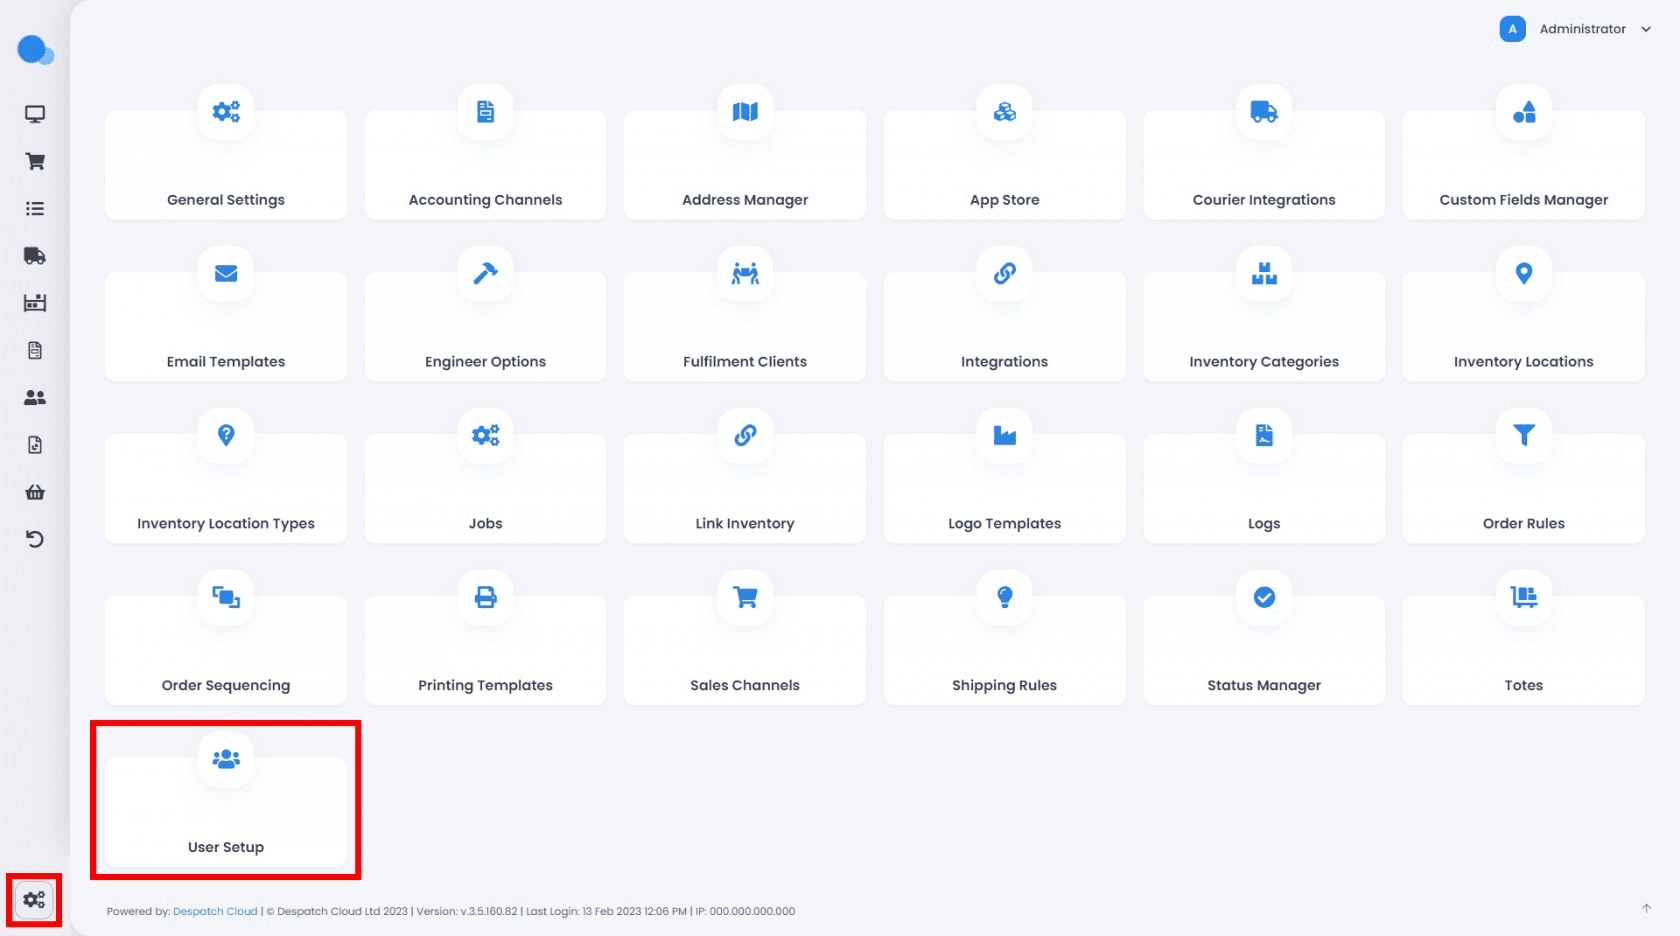
2. Click the New User Tab to Create an Account.
3. Fill Out the Relevant Fields, Then Click the Create User Button When You’re Done.
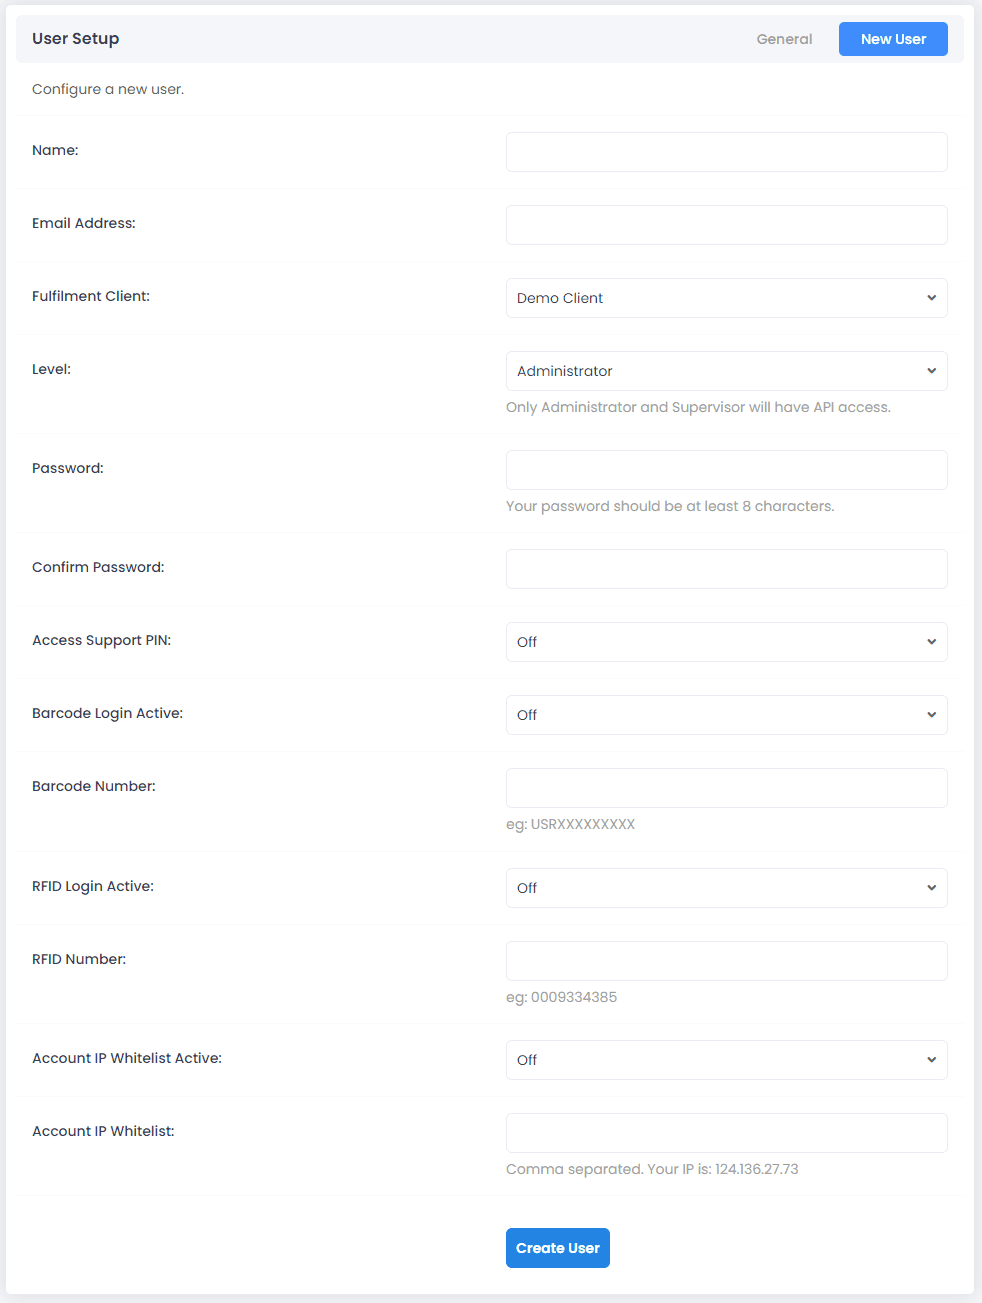
Just a few considerations:
Please keep in mind the user will be logging into the system through the email address you provide here.
For Fulfillment Client, select DC User to create a normal user, or select any Fulfillment Client you’ve created to assign this account to a fulfillment client.
Level refers to the permissions that account will have. You can leverage this functionality to give or restrict access to specific features and tools within the system. For a more detailed breakdown of what each level of access entails, please visit our documentation.
You can enable barcode and RFID logins for your accounts, allowing users to log in through scanning a barcode or RFID card instead of entering the password.
Account IP Whitelist: If turned on, the system only allows access from a specific IP address, or addresses.
We recommend you check out our documentation for additional guidance on this step.
And you’re all set! You have now successfully created a Fulfillment Client and a user account in Voila.